Dz-Win10 #Vulnerable
In this post, we will install and configure Windows 10 Evaluation Edition and make it vulnerable.
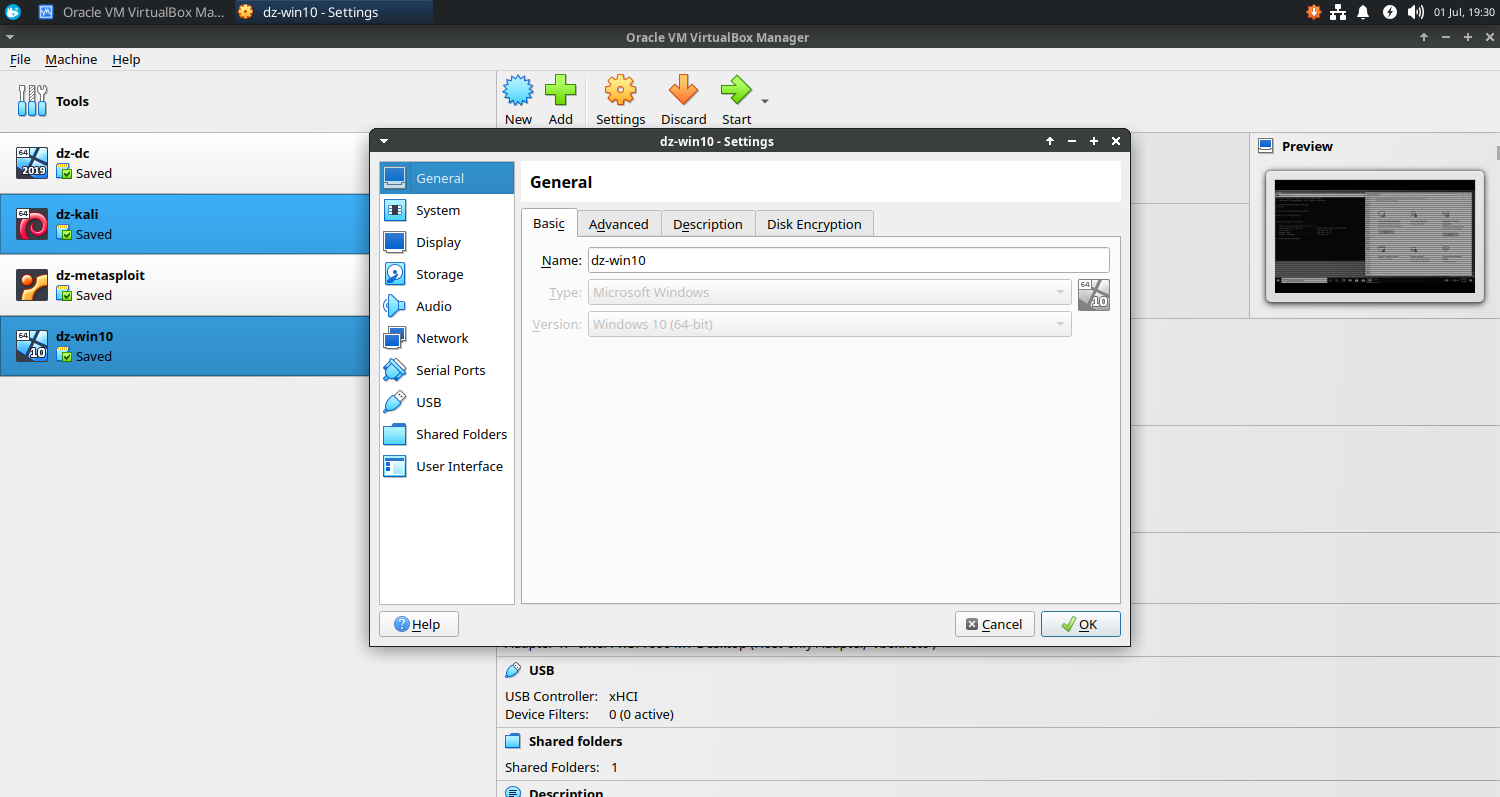
Virtual Machine Settings

General
- Basic
- Name: dz-win10
- Type: Microsoft Windows
- Version: Windows 10 (64 bit)
- Advanced
- Snapshot Folder: /home/devendrashirbad/virtualbox-vms/dz-win10/Snapshots
- Shared Clipboard: Bidirectional
System
- MotherBoard
- Base Memory: 4096 MB (try 2048 MB, sacrifice performance)
- Processor
- Processors: 2 CPU (try 1 CPU, sacrifice performance)
Storage
- Hard Disk: 50 GB (/home/devendrashirbad/virtualbox-vms/dz-win10/dz-win10.vdi)
- Optical Drive: /home/devendrashirbad/cs-lab/windows-10-evaluation-x64.iso
Network
- Adapter 1
- Host-Only Adapter: vboxnet0
- Adapter 2 (Emergency Only)
- Bridged Adapter: enp3s0
Shared Folder
- Folder Path: /home/devendrashirbad/cs-lab
- Folder Name: cs-lab
- Mount Point: z: (auto-mount)
Guest Additions
The Guest Additions are designed to be installed inside a virtual machine after the guest operating system has been installed. They consist of device drivers and system applications that optimize the guest operating system for better performance and usability.
Post Installation
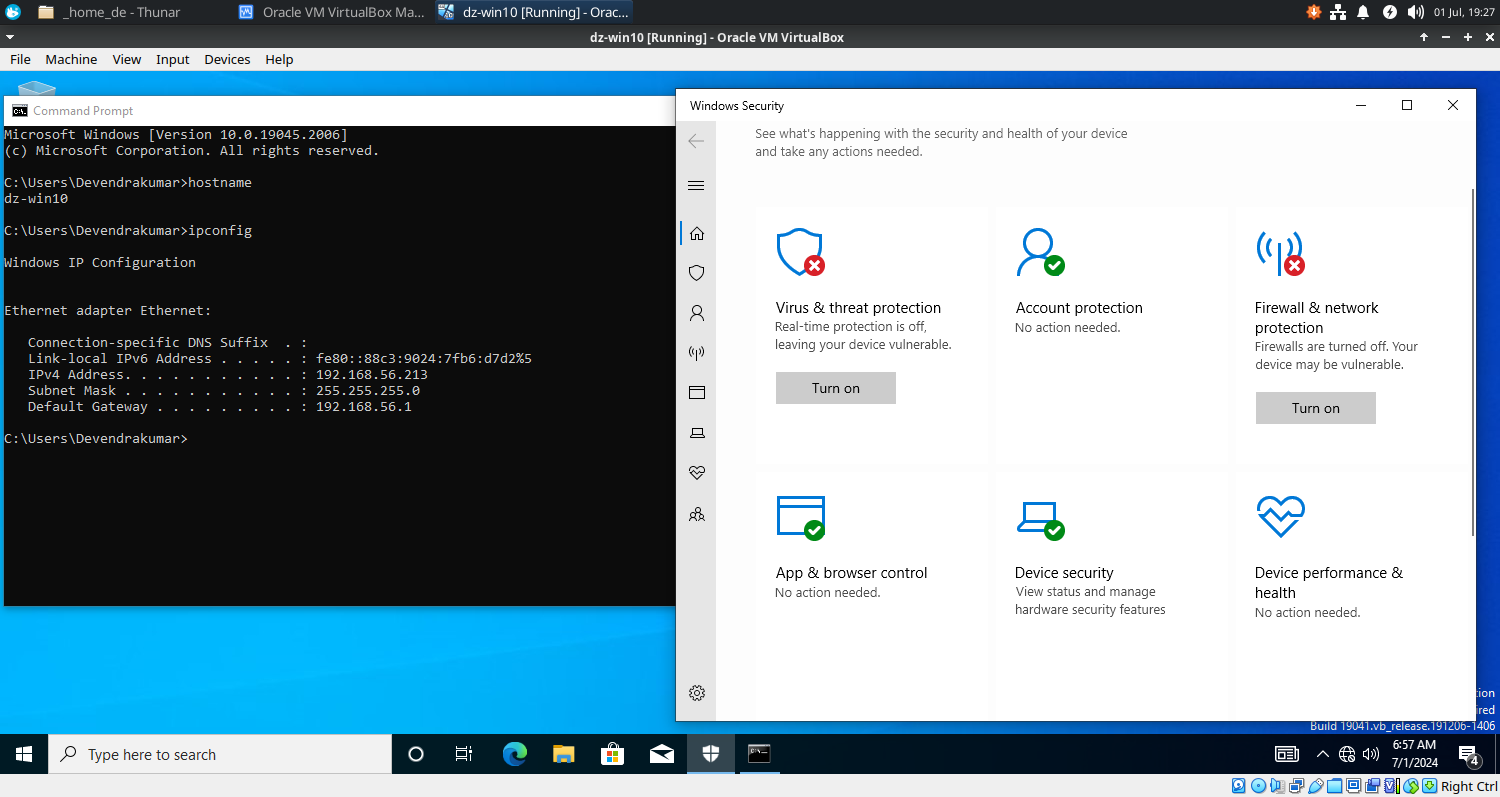
- Rename the hostname to ‘dz-win10’.
- Change the IP address to ‘192.168.56.213’.
C:\Users\Devendrakumar>ipconfig

Windows IP Configuration


Ethernet adapter Ethernet:

   Connection-specific DNS Suffix  . :
   Link-local IPv6 Address . . . . . : fe80::88c3:9024:7fb6:d7d2%5
   IPv4 Address. . . . . . . . . . . : 192.168.56.213
   Subnet Mask . . . . . . . . . . . : 255.255.255.0
   Default Gateway . . . . . . . . . : 192.168.56.1
⚠️ Make It Vulnerable
This system will act as a victim so we intentionally disable the security settings and make it vulnerable. You never do it in the PROD systems.
- Disable Virus and Threat Protection in Windows Security
- Real Time Protection
- Cloud Deliver Protection
- Automatic Sample Submission
- Tamper Protection
- Disable Firewall
- Domain
- Private
- Public
Install And Configure IIS Server
We might need the IIS (Internet Information Services) server for hosting our web application (maybe with malware) for penetration testing. It’s optional at the moment, we can do it any time in the future.
- Turn Windows feature on or off.
- Enable Internet Information Services.
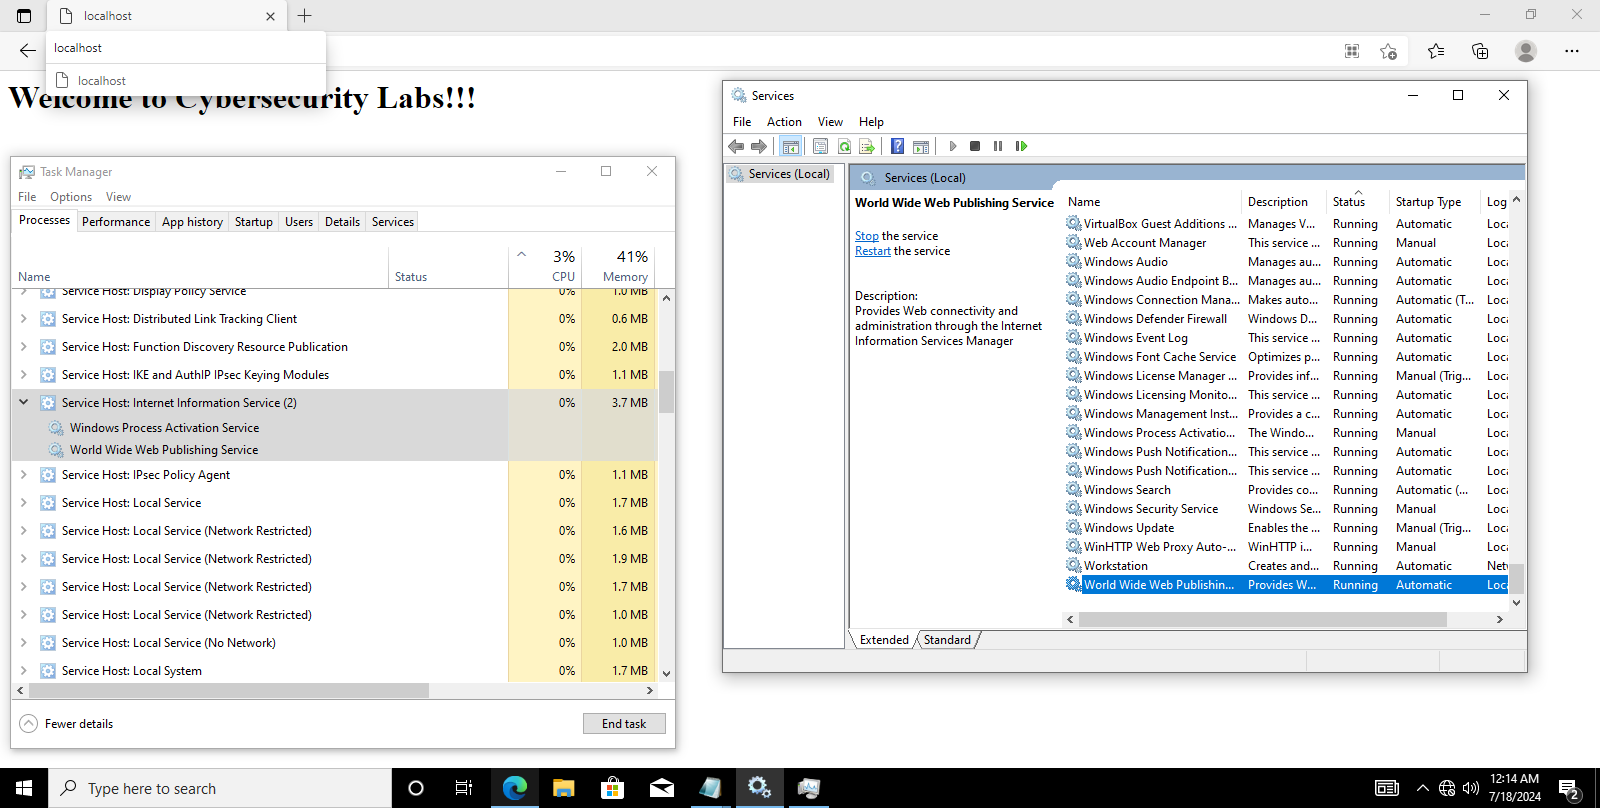
- Create an index page at the IIS root ‘C:\inetpub\wwwroot\index.htm’.
Welcome to Cybersecurity Labs!!!
- Launch a web browser and explore ‘http://localhost’. Did you notice the welcome message?
- Confirm that the IIS is installed and running (windows services, task manager etc).

Final Outcome
